| Date | 21st, Jul 2021 |
|---|
As an avid experimenter and builder of random contraptions—and who isn't the best at putting his tools away and normally has multiple projects in various stages of completion—I often run out of work space. So I decided to build a new workbench. One that would be better, not just because it was bigger but because it would be smarter. A bench that could automatically assist me in getting things done!
In my garage I previously had two main work spaces: a 183-by-76-centimeter butcher block that also houses a small milling machine, and a custom 147-by-57-cm work space with a built-in router that pops out as needed. Though this space is generous by most standards, it seems I always needed “just a bit" more. After some consideration, I purchased a 2x4basics custom workbench kit (which provides the bench's heavy-gauge structural resin supports) and lumber to form the main structure, and then cut slabs of chipboard to form a top and a bottom surface.
I decided on building a 213-by-107-cm bench. This was the largest space that I could reasonably reach across and also fit in my garage without blocking movement. The 2x4basics kit came with shelves, providing space for plastic storage boxes. At this point, I thought I was done, because surely this bench would be simply something that I built and used—a background thing that needs no more mention than a screwdriver or hammer would.
As it turns out, I can't leave well enough alone. The initial tweaks were small. To enhance the bench's storage, I added magnets on which to hang various tools, and augmented my existing storage cases with 3D-printed dividers. Then I added an eyebolt for my air compressor—a fabulous tool for its roughly US $40 price—to keep it at the ready for blowing off excess material. Toward the back of the bench rests a hot-air gun and a soldering station, as well as my bag of other electrical tools.
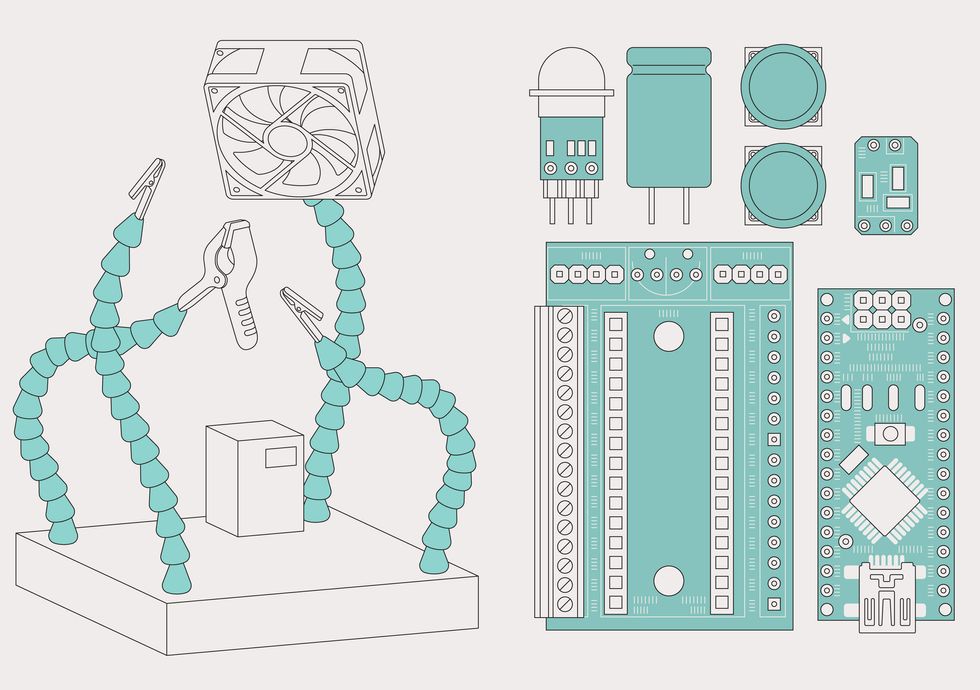 The solder squid (left) uses an EZ Fan board and a motion sensor to control a fan. The bench lights are controlled using an Arduino Nano (far right)inserted into another custom board, the Grounduino (middle), which also provides a dedicated space for the recommended large capacitor when driving addressable LED strips.James Provost
Then things got more complex. I added a DIY solder squid—a block with four flexible arms that I use to hold components in place while soldering—with a concrete base and an automatic solder fume extractor.
Yes, my solder squid is made out of concrete, via a 3D-printed mold—though that last refinement is perhaps optional. You could make nearly the same sort of brick using a plastic storage container. Heavy, cheap, and nonconductive, concrete is the perfect base material for such a device, and for arms you simply need to stick a few coolant lines in while the concrete cures. Two of the arms have alligator clips attached, one has a larger clamp, and the third has an old PC fan, recycled for my fume extractor.
I automated the fan by hooking up a rechargeable battery, a USB charger board, and a passive infrared (PIR) motion sensor. When activated by soldering movements, the PIR sensor turns the fan on with the help of a leftover original EZ Fan transistor board. (I created the EZ Fan board to control add-on cooling fans for Raspberry Pi computers, and now sell an even slimmer version.) This means that I don't ever have to remember to turn the fan on or off: It just comes on when it senses that I'm soldering. I normally keep it plugged into a USB port that provides power, but there is also a battery inside for when a USB port isn't available.
